Basic usage
This section describes the basic usage of the Posify for WooCommerce plugin. You will learn some basic terms, and basic usage of the plugin.
Basic terms
Store
- A store is a physical location where you sell your products. You can have multiple stores in Posify.
- For example, you have a brand named "The best coffee" and you have 2 stores: Store A at the address 123 Main St, Store B at the address 456 Main St.
Register
- A register is a device that you use to sell your products. You can have multiple registers in a store.
- The cashier uses the register to sell products to customers.
- The store can have multiple registers. For example, at Store A, you have 2 registers: Register A at the front of the store, Register B at the back of the store.
Register session
- A register session is a period of time that the cashier uses the register to sell products to customers.
- The cashier can open, and close the register session to start selling products to customers.
- The register session is often opened at the beginning of the day, and closed at the end of the day.
- You (admin) can view the register session report to see the sales of the cashier in the register session.
Receipt
- A receipt is a document that the cashier gives to the customer after the customer buys products.
- After create a order, the cashier can print the receipt to give to the customer.
Basic usage
After installing the plugin, Posify will automatically create a "Default store", a "Default Register", and a "Default Receipt" for you.
We automatically create them for you to help you get started quickly. You can use them to sell your products or remove, edit them to suit your needs.
Start a register session
From the WordPress admin sidebar, click on the Posify > POS menu to go to the POS page.
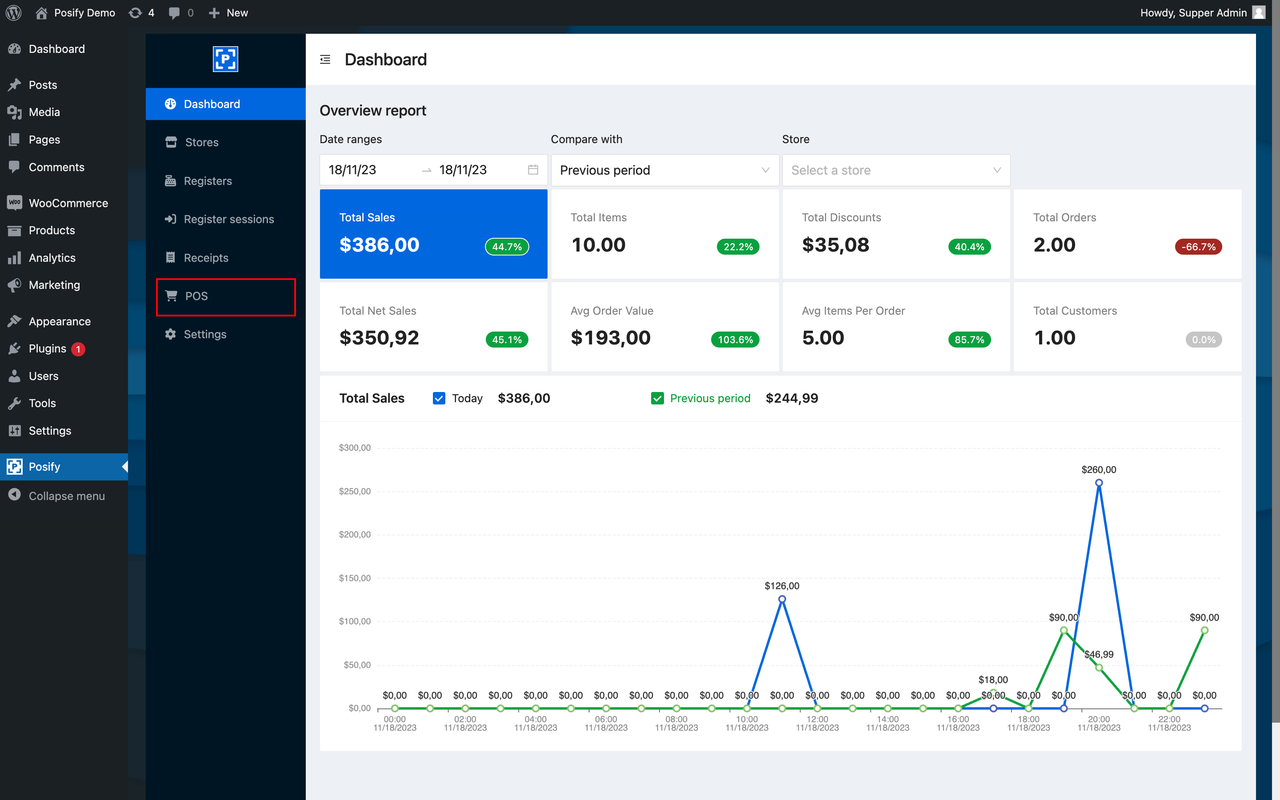
May be Posify need you login to the POS page. If so, please login with your WordPress account. After that, you can chose the store, and the register to start selling products.
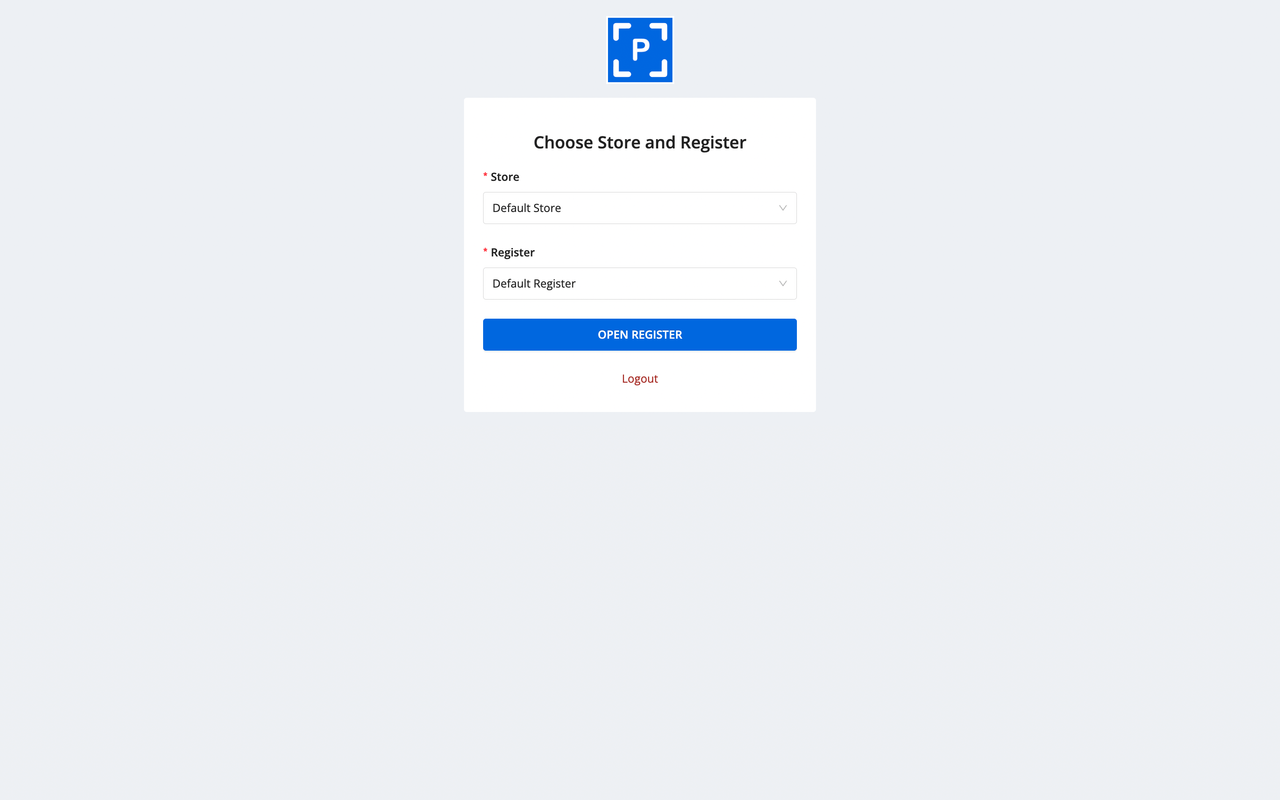
Final click to the Open register button to start selling products. And you will see the POS page like this:

Ok, you have just started a register session. Now you can sell your products to customers.
Create a first order
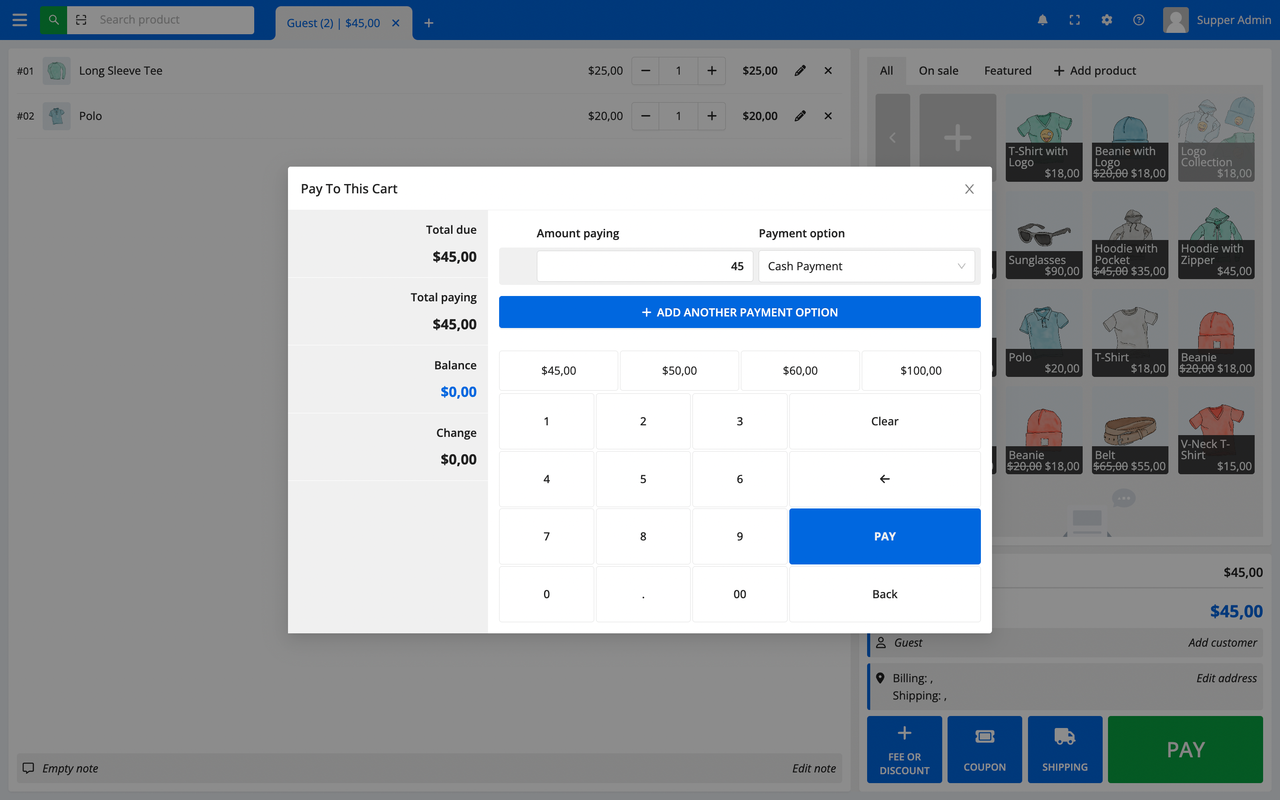
Looking at the POS page, you will see the POS page can be divided into 3 parts:
- Part 1 is the cart
- Part 2 is the product list
- Part 3 is the order details
Try to click on the product in the product list to add it to the cart. And click the Pay button to create a order.
After click the Pay button, the payment modal will appear. You can choose the payment method, and click the Pay button to finish the order.
After click the Pay button, the order will be created. And you will see the order details in the order details.
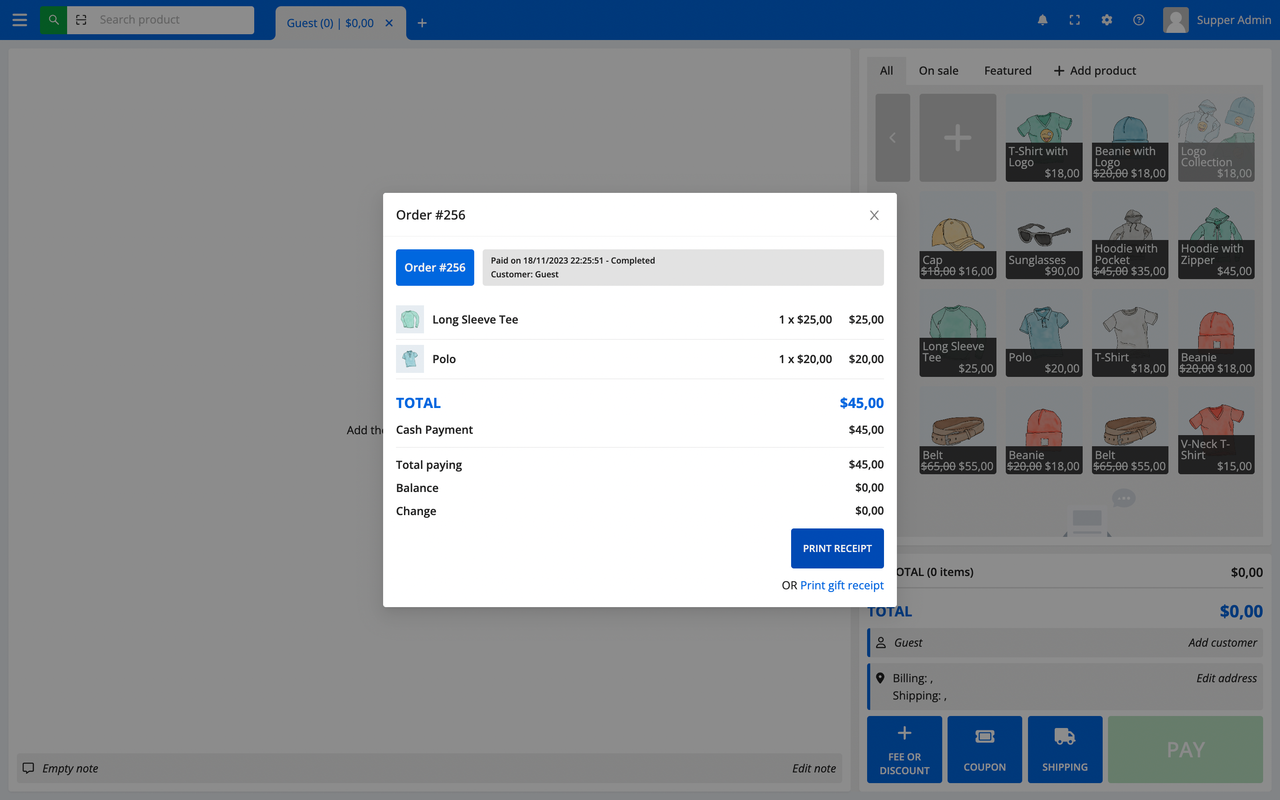
You can click the Print button to print the receipt for the customer.
Ok, you have just created a order.
View order history
You can view the order history by click on the menu and choose the Order history menu.

After click on the Order history menu, you will see the order history page like this:
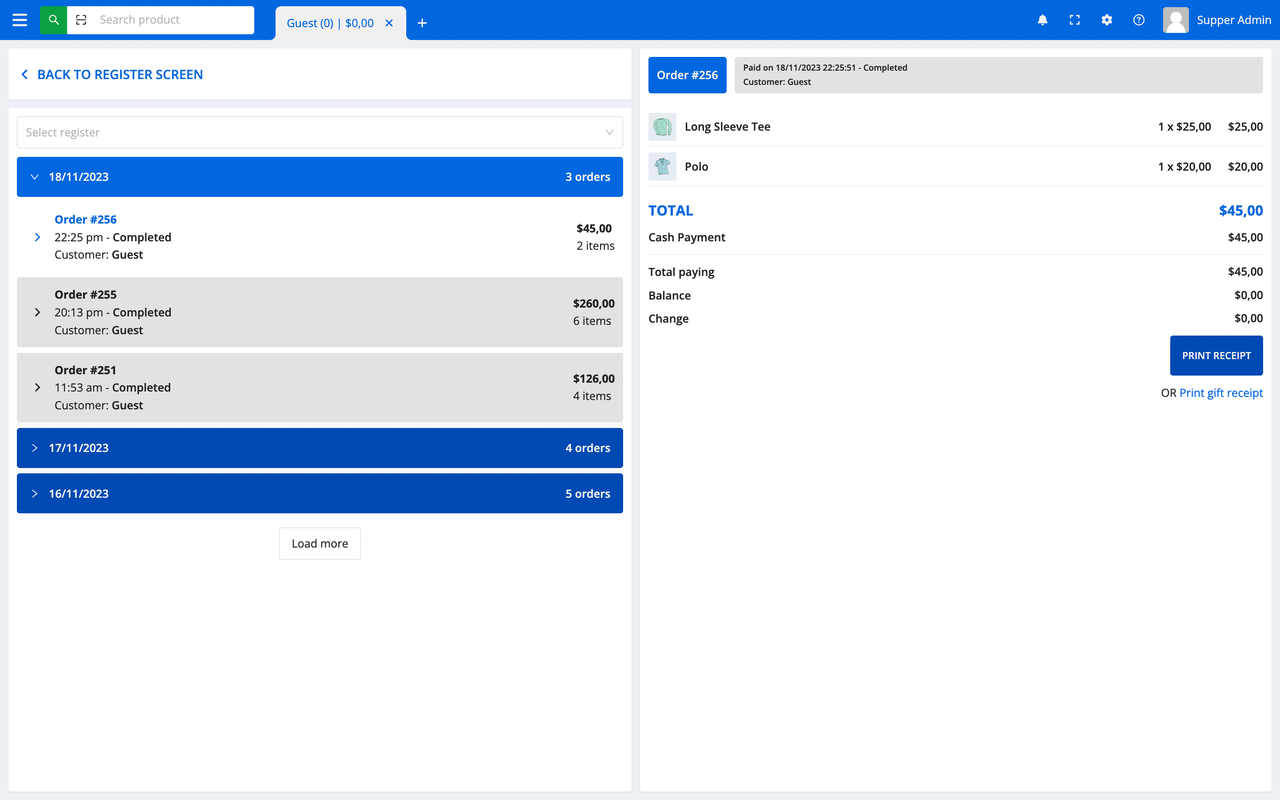
And you can see the order that you have just created. Here you can view the order details, print the receipt again.
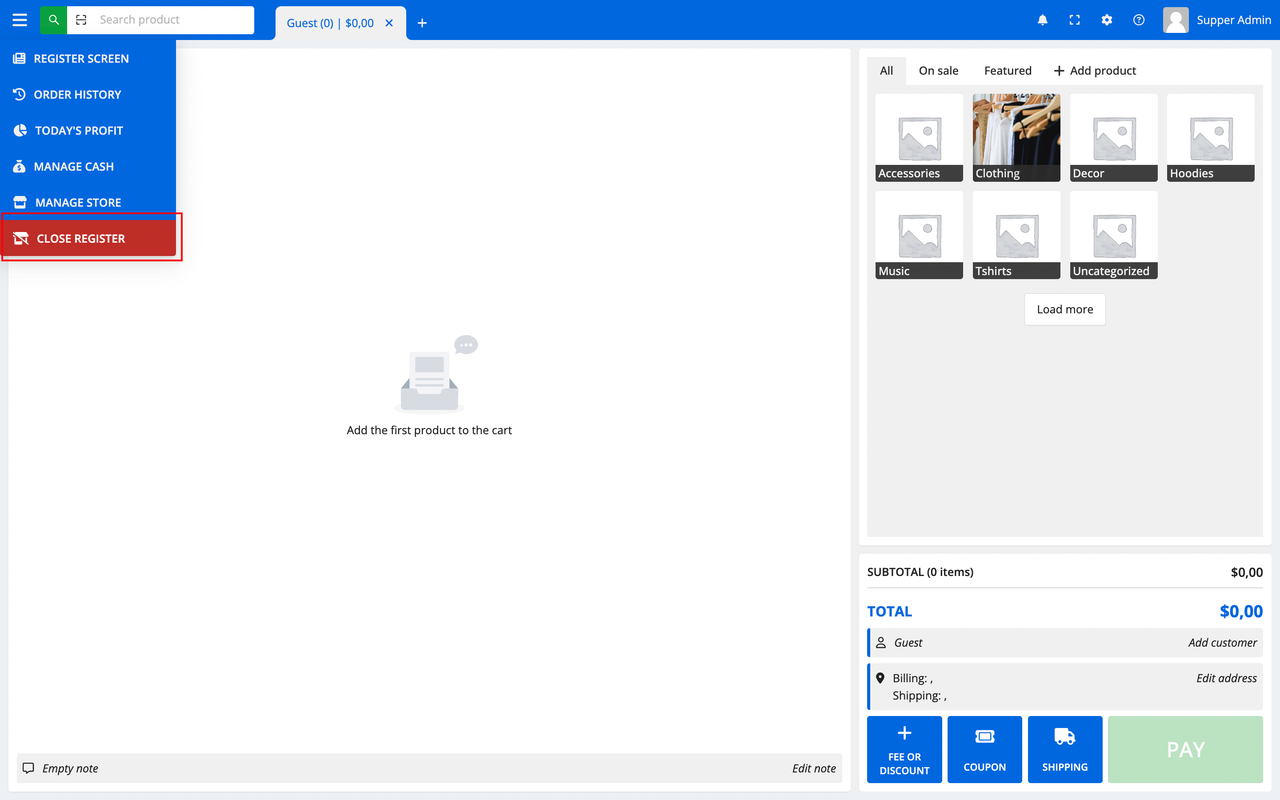
Close the register session
If you want to close the register session (may be end of the day), you can click on the Close register button.
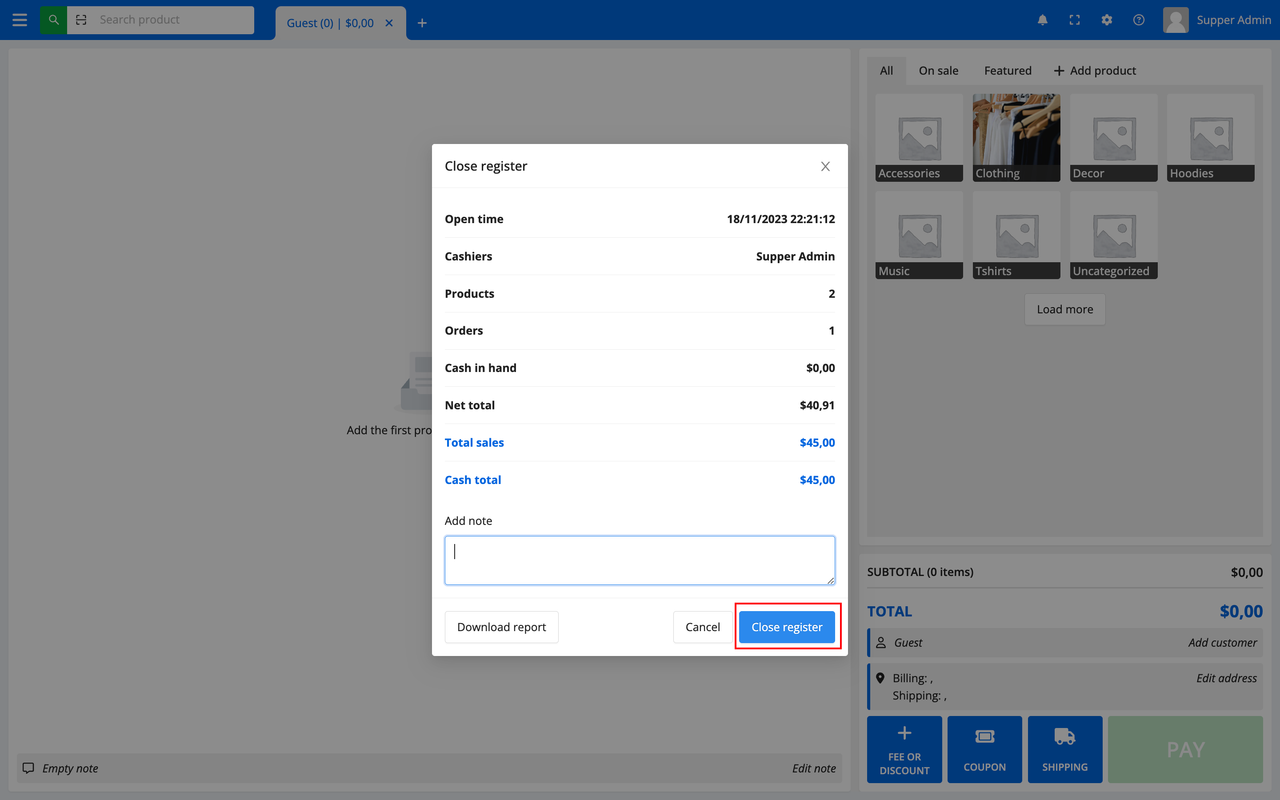
After click on the Close register button, the Close register modal will appear. You can see the register session report, and click on the Close register button to close the register session.
WARNING
The register session can not be reopened after closed. So please make sure you want to close the register session before click on the Close register button.
Conclusion
Ok, I think that is enough for the basic usage of the Posify for WooCommerce plugin. In the next sections, I will explain details for each feature later.